Hatching new scientists every day!
Unit Overview

Unit Overview

In this three-week curriculum, children explore the science of water:

Week 1: Pour, Squirt, Drip, Drop
Discover different ways to make water move and experiment with water drops.

Week 2: Puddles, Streams, Dams, and Waterfalls
Explore where we find water in our daily lives and make waterways outside.

Week 3: Sink or Float
Explore objects that sink or float; then make boats that float.

Roughly one to two hours (70–110 minutes) of science exploration is offered throughout a day. The day is broken into four segments:

Morning Circle (25–35 min.)
Read a story or watch a PEEP video (15–20 min.). 
Then do a short, hands-on activity (10–15 min.).

Learning Centers (15–30 min.)  
Give children time for free exploration at 4–5 different learning centers.

Guided Activity (20–30 min.)
Guide children through a longer, hands-on activity.

Closing Circle (10–15 min.)
Get together and share the day’s discoveries.

Learning Goals

Learning Goals

Science Concepts

As children explore water, they will begin to understand the following key science concepts:

  • Water takes the shape of its container.  
  • You can use lots of different objects to move water.
  • Water can flow quickly or slowly.
  • Water sticks together to make drops.
  • Water flows downhill.
  • You can change the direction water flows.
  • You can stop the flow of water by building dams.
  • Water behaves differently on different surfaces.
  • Some surfaces absorb water; some don’t.
  • Objects behave differently in water. Some float; some don’t.
  • If you add enough weight to a floating object, it will sink.

Children will practice scientific skills as they learn about water. They will:

  • observe and describe how water looks and moves.
  • classify the way different objects behave in water.
  • do simple experiments, talk about cause and effect, and share ideas.

Language and Literacy 

Vocabulary

  • Through hands-on experiences and discussions, children will become familiar with words such as funnel, float, sink, flow, drip, stream, dam, and absorb.
  • They will learn vocabulary for bodies of water: puddle, stream, river, lake, pond, waterfall, and ocean.  
  • They will also hear words that help them develop scientific skills, like change, observe, describe, compare, contrast, discover, identify, test, and predict.   

Print Awareness

Children will see their words written on charts. They’ll listen and “read” along as the words are read back to them.

Book Experiences

Children will listen to read-aloud books about water and explore books independently.

Emergent Writing

Children will record their own water observations through drawing, tracing, and “writing.”

Early Math

Children will describe and compare water levels, amounts of water, and how fast water moves.

Materials

Materials

Below is a list of all the materials you’ll need for the activities and learning centers.

General

❏ Let parents know that their children will be exploring water. Ask them to send in an extra set of dry clothers, just in case. 

❏ water smocks (or if appropriate, have children wear bathing suits while doing activities outside)

❏ plastic table cloth or sheeting to protect floors

❏ cloth towels, paper towels, and a mop to wipe up any spills

❏ art supplies: pencils, crayons, markers, water colors, paints, printer paper and/or construction paper, scissors, glue, paste, tape, balls of blue yarn, blue wrapping paper, and/or blue cellophane wrap  

❏ camera and/or video recorder

❏ clipboard, paper, and marker

❏ chart paper and marker

Week 1: Pour, Squirt, Drip, Drop 

Water Table Activities 

❏ water table, large tubs, and/or wading pool.

Limit the number of children at a water table to four or five at one time. Depending on the size of your group, you may want to use several water tables or a combination of water tables and large tubs. Or you can use a large wading pool outside, which makes it possible for the entire group to work together (and avoids indoor messes).

❏ plastic eyedroppers or pipettes (6” jumbo pipettes can be ordered in sets of 100 from Carolina Biological Supply catalog #73-6988 www.carolina.com or call 1-800-334-5551)

❏ turkey basters

❏ plastic cups, soda bottles, squeeze bottles

❏ funnels

❏ sponges

❏ clear flexible plastic tubes, cut into 2 and 3-foot lengths

❏ plastic baggies or rubber gloves

❏ colanders and/or strainers

❏ wide-mouthed bottle or vase

❏ paper cups

❏ medium-sized container or bucket, preferably transparent

Water Drop Activities 

❏ several plastic trays

❏ small containers of water

❏ plastic pipettes or eyedroppers

❏ wax paper

❏ plastic plates

❏ toothpicks

❏ sponges

❏ paper towel

❏ cotton balls

❏ paper and markers

❏ paper towels, plastic sheets, newspapers, towels for keeping floor dry 

Week 2: Puddles, Streams, Dams, and Waterfalls 

❏ water containers (plastic buckets, bottles, squirt bottles, and cups)

❏ squeeze bottles

❏ digging tools or sticks

❏ garden hose (optional)

❏ 6–12 pictures each, downloaded from the Internet or found in books of:

  • puddles
  • streams
  • rivers
  • beaver dams
  • human-built dams
  • small waterfalls
  • large waterfalls

❏ clipboards, paper, and markers

❏ objects that can change the direction of water or block water flow: rocks, pebbles, bricks, pieces of wood, sand etc.

Week 3: Sink or Float

❏ water table, large tubs, and/or wading pool.

Limit the number of children at a water table to four or five at one time. Depending on the size of your group, you may want to use several water tables or a combination of water tables and large tubs. Or you can use a large wading pool outside, which makes it possible for the entire group to work together (and avoids indoor messes).

❏ two large plastic bins, preferably transparent, with two picture signs attached that convey “Float” and “Sink”

❏ collection of objects that float or sink (rubber bands, sponges, pencils, plastic bottles with tops, wooden blocks, plastic straws, craft sticks, small plastic toys)

❏ collection of balls that sink or float (ping pong ball, golf ball, tennis ball, rubber ball, marble, Wiffle ball)

❏ for “water globes:” clear plastic bottles with tops, sequins, glitter, and food coloring 

❏ an orange

❏ toy boats

❏ boat-making materials: plastic plates, pieces of Styrofoam, plastic cups, containers, and bottles, straws, craft sticks, masking tape, scissors

❏ aluminum foil, recycled Styrofoam food trays

❏ clay (this should be non-water-soluble, oil-based plasticine)

❏ pennies (a few hundred)

Videos

Videos

Videos: PEEP Episodes

These animated videos about water are used in the curriculum.  

Dry Duck, Part 2 (9:00)

Beaver Boy has left town and Quack's pond has dried up. Coincidence? Or is something fishy going on?
 

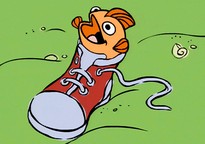
The Fish Museum (9:00)

Poor Fish Jr. She wants so much to wear sneakers and sit in a tree. Can Quack make her dreams come true?


Videos: PEEP Live-Action 

These live-action videos about water are used in the curriculum.

After the Rain (1:30)

What does the rain leave behind? The kids find water droplets around the yard, and then make their own rain.
 

Make Your Own Stream (1:30)

A stream in the woods is the perfect place to float things in a current. The kids also make their own stream at home.
 

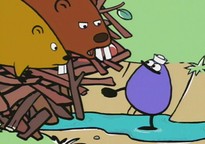
Beaver's Buildings (1:30)

The kids are visiting a wildlife refuge to see the work of local beavers.
 

Building Dams, Part 1 (1:30)

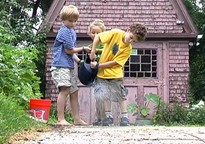
The kids experiment with different materials to create a dam and control the flow of water from the hose.
 

Building Dams, Part 2 (1:30)

Now the kids have added a second dam upstream from their first dam. When they do, their first dam runs a bit dry. What happens when they break their dams?
 

Floating Fun (1:30)

Some things float and other things sink. That's what the kids find out when they start putting stuff in the pool.
 

Sinking Ships (1:30)

Making boats and floating them in a pool is fun. Sinking them is even more fun! The kids let their boats take on water and sink. They also make them sink by adding heavy cargo.


Books

Books

Read-Aloud Books 

These books are used in the curriculum. They are available in bookstores or from the library.

Marzollo, Jean. I Am Water. Scholastic, 2003. Water is all around us.

Kerley, Barbara. A Cool Drink of Water. National Geographic Society, 2002. See people drinking water around the world.

Weeks, Sarah. Drip, Drop. Harper Collins, 2000. It’s raining and Pip Squeak’s house is leaking.

Cobb, Vicki. I Get Wet. Harper Collins, 2002. Review some of the things you’ve discovered about water.

Asch, Frank. Water. Harcourt, 1995. Look at all the different places there’s water!

De Sève, Randall. Toy Boat. The Penguin Group, 2007. A boy’s toy boat sails off to sea.

Allen, Pamela. Who Sank the Boat? PaperStar, 1982. Was it the cow, the donkey, the sheep, the pig, or a little mouse?

Additional Books (Optional)

You may also want to share these books with children.

Lyon, George Ella. All the Water in the World. Richard Jackson Books, 2011. Follow water from rivers and oceans to faucets and hoses. 

Nelson, Robin. Water. Lerner Publications, 2005. Find out about water in all its forms.  

Handouts for Parents

Handouts for Parents

In the first week of the Explore Water curriculum, print this letter and send it home with children's parents or guardians. The activities in the letter give families and children ways they can enjoy science together. The letter also gives book and Web site recommendations. During the Morning Circle, invite children to share their at-home science discoveries with the group.

Each letter is provided in English and Spanish:

Explore Water with Your Child (PDF)

Explore el agua con el niño (PDF)

For parents new to PEEP, there’s also a handout with tips for:

Exploring Science with Children (PDF)

Exploremos las ciencias (PDF)

Educator Reflection

Educator Reflection

These questions may help you think about the successes and challenges of the Explore Water unit.

  1. What was the most satisfying part of the Explore Water unit for you and your children? Outdoor water play? Indoor play at the water table? Experimenting with water drops? What made it so satisfying?
  2. As you watched and listened to your children explore, what things surprised you? (For example, certain questions or observations about the properties of water, unusual ways children used the materials, or specific things that fascinated them.)
  3. What activities might you change or extend the next time you use the Explore Water unit? What would you keep the same? How could you build on your children’s particular interests and enthusiasm to make this an even richer learning experience?
Educator Close-Up

Educator Close-Up

I've learned a lot by engaging my class in a study of water. First, I learned about the importance of stepping back and being a child watcher. I used to think that in order to teach, I'd have to tell children things and bombard them with questions, directions, and information so children would get the right answer. But now I realize that getting the right answer isn't necessarily the goal. Rather, what is important is for children to have the time and space to wonder, to explore and to experiment, and to learn about the joy of discovery.

I’m also learning that there are different ways that children know about knowing. I mean, it’s one thing to know things in words—to be able to explain how water moves, where it goes, and how to make it go fast or slow. But knowing in words is hard for children (and for adults, too)! So my challenge as a teacher is to figure out what children understand and what they want to know by what they do and how they explore—not necessarily by the words they use.

––Oren, preschool educator


Prepare To Teach

Prepare To Teach

Introduction

  • Print the interactive PDF of the Curriculum Planner to familiarize yourself with all three weeks of the curriculum. (Clicking on the activities in the PDF will open up a page featuring the activity.)
  • Then roll up your sleeves and explore some of the same hands-on activities your children will try during the curriculum.
  • Review the Using Media sections for tips on reading books, watching videos, and playing online games together.

Hands-on Activities

Plunge in and get ready to discover water. These hands-on activities will help you:

  • discover different ways you can use the materials.
  • learn more about the science of water.
  • troubleshoot problems that might arise.
  • think about ways you can help children get the most out of their science explorations.

Safety Notes 

  • Each day, be sure to clean and disinfect the water table and the plastic containers you use, and use fresh water.
  • Have plenty of towels and/or a mop handy for cleaning up spills.
  • Set guidelines about splashing and squirting.
  • Limit the number of children at the water table.
  • Provide water smocks. 

Indoor Water

Pour, Squirt, Drip, Drop 

  • Fill up your water table with room-temperature water, and gather some plastic cups, soda bottles, funnels, squirting tools (such as a dish detergent bottle, baster, spray bottle), and toy water pumps or recycled soap dispensers.
  • Start with your hands. How many ways can you use your hands to move water? Think about how it feels, what you see, and the different sounds it can make. When you do this activity with your children, what size groups do you think would work best?
  • Fill a small cup with water. Then, pour the water into a big cup. Pour the water back and forth. What do you notice about the height of the water in the two cups? Try pouring the cupful of water into other bottles and containers. Can you guess how many cups of water it will take to fill various containers?
  • Dunk bottles in water to fill them. What do you see and hear? How else can you fill the bottles?
  • Experiment with different ways to use a funnel. Can you use a funnel to carry water?
  • Try using a baster, squirt bottles, and spray bottles. How far can you squirt water? Can you use these tools to make bubbles in the water?

Water Drops

  • Gather a small container of water, a plastic pipette or eyedropper, wax paper, and a toothpick.
  • Use the pipette to make water drops on wax paper. What happens when you squeeze the pipette gently? When you squirt it hard? What happens when you change the angle, holding the pipette straight up-and-down or at a slant?
  • Take a toothpick and push the water drops around. What do you notice? Hit the big drops with the toothpick. What happens?
  • Make water drops with the dropper on other surfaces, like a dry sponge or a piece of construction paper. What do you notice?
  • With the dropper, make “raindrops” on a window, mirror, or other smooth up-and-down surface. Have a raindrop race with your partner. What do you notice? Why do you think that happens?  Water sticks together. It forms rounded drops on some surfaces and not on others. When two drops touch, they merge to form a larger drop.

Floating and Sinking

  • Gather objects to use in “float or sink” experiments. Here are some ideas: a rubber band, a sponge, a pencil, a plastic bottle, a wooden block, pennies, foil, plastic straws, craft sticks, and small plastic toys.
  • Predict which objects will float and which will sink. Then, test your predictions. Any surprises?
  • Next, use other objects to try to make the floating items sink and the sinking items float.
  • Make boats out of recycled materials (food trays, aluminum foil, craft sticks, pieces of sponge).
  • Through their experiences, children will discover that some objects float and others don’t. At this age, children are not ready to understand the science behind floating and sinking. Instead, have children talk about why they think each object floats or sinks.
  • For example, a child might say, I think it floats because it’s round. This is a valid hypothesis if it is based on that child’s experiences—all the round objects she or he has tested have indeed floated. Further experimentation may help the child rethink that theory.

Outdoor Water

Before going outdoors, gather some water containers (such as a plastic pail, watering can, soda bottles, cups, squirt bottles) and tools for painting with water (such as large paint rollers and/or brushes). Then head outside and try some of these ideas.

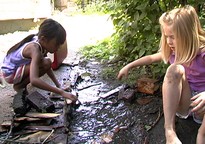
  1. Pour water on different surfaces, such as blacktop, sidewalk, dirt, sand, grass, the slide, a bush, and a railing. What happens? Does the water sink in? Make a hole? Form a puddle? Make mud? Leave droplets? Flow in a certain direction? Each time, pour more water in the same spot and notice what happens.
  • What ideas do you think children will have about why water behaves differently on different surfaces? How could you encourage them to share their ideas?
  1. Make a puddle in the dirt. Use a stick to dig a path for the water to flow out of the puddle. How far can you make the water flow?
  • What techniques can you use to make the water flow farther?
  • Where are some good places for your students to do this experiment?
  1. Find a sloping area of dirt or blacktop to make a stream. Pour water from a container (or use a hose) to create a stream of water. Notice how the water moves and the path it takes. Does it move at a continuous speed? Does it form pools? Does all the water follow the same path? Try this out in a couple of different places. Does the water behave differently?
  • How could you encourage a group of children to work together on these activities?
  1. Use stones, twigs, and leaves to build dams that block or change the path of the stream. What materials block or turn the water?
  • Where would be the best place to do this activity with the children?
  • What do you think children would learn from this activity?

Using Media: Books

Here are a few tips for reading aloud to your children.

  • Read the book several times before sharing it with children. Mark the places where you would like to pause to ask questions or explain unfamiliar words.
  • Talk about the cover. Point out the title, author, and illustrator. Look at and talk about the art.
  • Ask children to predict what might happen in the story.
  • Read the story with the children once without stopping so children can follow the story. Then read it again, stopping to ask some open-ended questions (questions that don’t have a yes or no answer) that will help children think about, remember, and discuss the story later.
  • Read slowly so children can understand and enjoy the rhythm of the words and explore the pictures.
  • Hold the book so that everyone can see it.
  • Add drama to your reading by using different voices and simple props. Don’t be afraid to be silly or dramatic.

Using Media: Videos

Help children think and talk about what they are watching by encouraging active viewing.

  • Watch the video ahead of time so you’re familiar with it. 
  • Before viewing, tell children something about the story to capture their interest and introduce unfamiliar words and ideas.
  • While viewing, show children that you are engaged by focusing intently, laughing, showing amazement or surprise.    
  • After viewing, ask open-ended questions, such as,
    • How did Quack’s pond dry up?
    • How did they fix the problem?
  • When children watch the live-action videos, which feature children exploring science, ask questions comparing their experiences to the children in the video: 
    • Do the children’s experiments with water remind you of anything you’ve tried to do with water? What have you noticed about water drops? 

Screen Time for Children

The National Association for the Education of Young Children (NAEYC) and the Fred Rogers Center state that "technology and interactive media are tools that can promote effective learning and development when they are used intentionally by early childhood educators, within the framework of developmentally appropriate practice to support learning goals established for individual children."

This curriculum uses nine-minute PEEP episodes, one-and-a-half-minute live-action videos, and online science games as a springboard for discussion about science with children. All videos and games were vetted by early childhood education experts and are presented in the context of a lesson plan that promotes active viewing. 

After children have watched the videos, played the games, and discussed both, this media is made available to children in a Learning Center. NAEYC recommends you "limit any use of technology and interactive media in programs for children younger than two to those that appropriately support responsive interactions between caregivers and children and that strengthen adult-child relationships.” This is why the Technology Learning Center should be reserved for children who are older than two.